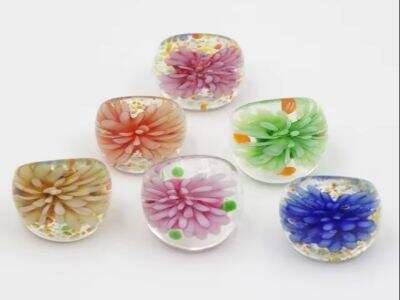
Стаклене перле су лепе и забавне: могу се декоративно користити на много начина. Могу се намотати за прављење накита као што су наруквице и огрлице, или се могу поставити у стамбене ентеријере за акценте у боји. Ми у Кунди имамо уверење да свако може учинити лепо валидним Стаклена животиња Драгонфли и стаклене перле са мало вежбе и алата. Ако желите да почнете да правите своје стаклене перле, ево неопходних алата и опреме.
Стаклене шипке: Ово су шипке боје које ћете истопити да бисте формирали своје перле. Требало би да изаберете квалитетне стаклене шипке у бојама које волите. Стаклене шипке ретко су у недостатку у занатским радњама или на мрежи.
Пропан/бутан бакља: бакља за топљење стаклених шипки. Да би се стакло правилно истопило, ова бакља треба да достигне температуру од најмање 2000°Ф. САВЕТ: Не заборавите да се придржавате безбедносних прописа док користите бакљу!
Трн: Ово је метални штап који ћете користити да формирате отопљено стакло у перлу. Уверите се да је трн направљен од материјала отпорног на високе температуре (тј. нерђајући челик). То ће му помоћи да продужи рок трајања и перформансе.
Средство за одвајање перли: Ово је посебан премаз који се наноси (на трн) како би се спречило да се растопљено стакло стопи са трном. Ако не користите ослобађање перли, ваше перле се могу залепити за трн што ће их касније отежати за ослобађање.
Клешта: Пар средњих или малих клијешта са игличастим носом ће вам помоћи да обликујете стакло и да држите трн док радите. Они су корисни јер њима можете ухватити стаклене шипке и окренути их да направите своје перле.
Пећ — пећ је врста пећи која се користи за полако хлађење стаклених перли. Ово је познато као жарење и осигурава да када се перле потпуно охладе, не пуцају или пуцају. Перле направљене у пећи су јаке и издржљивије од других врста.
Прављење перли које су потпуно округле
Потребна је вежба да бисте направили савршене округле перле, али је сјајно забавно! У наставку можете пронаћи водич корак по корак како то учинити.
Први корак је облагање трна са ослобађањем перли. Обавезно га добро покријте и оставите да се потпуно осуши пре употребе. Ово олакшава да перле касније отпадну.
Упалите бакљу и поставите пламен на средњу јачину. Желите да пламен буде довољно врућ да отопи стакло, али не толико да изгори све.
Таке Орнамент од стакленог зеца и стаклени штап са тилодером и проћи кроз пламен док се не растопи. Пазите на пламен, не прилазите превише близу!
Након топљења стакла, поставите га на трн. Равномерно га премажите тако да перла не буде лошег облика. Желите да стакло лепо лежи преко трна.
Сада бисте своју стаклену перлу помоћу клешта обликовали у облик који вам се свиђа или желите. Ово је место да постанете маштовити и прилагодите своју перлу!
Када будете задовољни како ваша перла изгледа, оставите је да се охлади пре него што је скинете са трна. У супротном, биће деформисано и сломљено.
Дизајнирање лепих шара и боја
Небо је граница за забавне, декоративне пројекте стаклених перли! Да бисмо вам помогли да изразите своју креативност, ево неколико савета:
Пробајте различите боје штапова, штапова којима ћете истопити стакло. Комбинујте боје док доживљавате визуелно најпривлачнију опцију. Можда ћете управо открити мешавину коју апсолутно волите!
Укључите варијације површине и формирајте перле користећи посебне алате за обликовање као што су марвер и пресе. Можете користити ове алате да направите различите шаре и ефекте на својим перлама.
Комбинујемо шипке различитих дебљина и величина. То ће вам помоћи да избегнете уобичајене дизајне који су направљени раније
Такође, не заборавите да експериментишете са улепшавањем својих перли -- шљокицама, другим малим перлама, итд. Заиста, ове додатне карактеристике могу оживети ваше стаклене перле.
У потрази за неухватљивом сјајном глатком завршном обрадом
Без обзира на коју врсту стаклених перли заплешете, желећете да оне донекле светле када будете украшавали срне. Испод је неколико савета како бисте добили што глаткију, сјајну завршну обраду:
Дијамантском турпијом или брусним папиром изгладите све грубе ивице или неравнине на перли. Ово ће спречити да се перла осећа лоше, а да истовремено изгледа.
Изгланцајте перлу да бисте се ослободили преосталог ослобађања перли и крхотина стакла. Ваша перла ће заблистати ако се уверите да је чиста.
На крају, можемо користити точак за полирање или меку крпу за полирање и сјај перле. Уз мало лакирања, ваше перле ће изгледати сјајно!
Решења за уобичајене проблеме при прављењу стаклених перли
Прављење стаклених перли је тако забавно, али повремено перле не испадну како сте планирали. Ево неких уобичајених проблема на које можете наићи и лекција о томе како да их избегнете:
Пукотине или ломови — ово је показатељ да ваше стаклене перле нису правилно жарене. Уверите се да жарите перле у пећи на довољно времена и температуре, да бисте то избегли.
Неравне перле: Ако су ваше перле погрешног облика или грудвасте, то ће бити зато што стакло није било равномерно загрејано. Па, загреј то Стаклена огрлица привезак и стакло равномерно и полако и навикните се на то како функционишу ти алати за обликовање пре него што направите своје перле.
Лепљење зрна за ослобађање: Превише ослобађања перли или непрописно осушен слој може да се залепи за стакло. Ово се може избећи тако што ћете увек користити веома танак слој за ослобађање перли, пазећи да буде сув пре него што почнете да радите.
У Кунди верујемо да свако може да створи прелепе стаклене перле уз праксу и праве алате. Користите ове савете и технике и створићете перле у стаклу које су заиста јединствене, баш као и ви! Забавите се у изради!

 EN
EN


